Account Settings
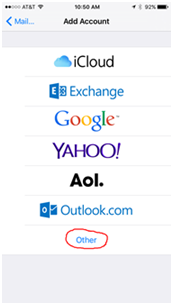
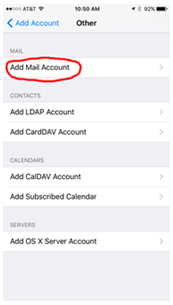
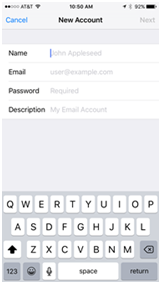
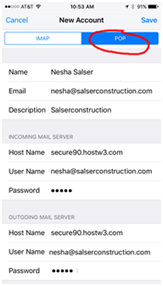
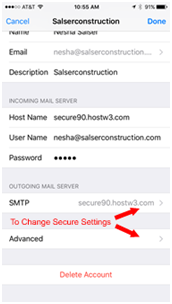
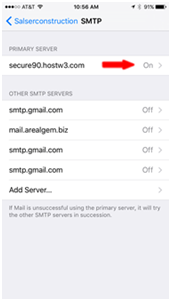
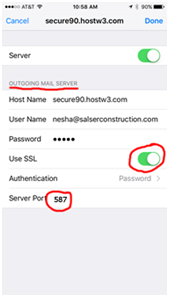
There are two ways to connect to our mail server. Secured and unsecured. You can use the default settings and it will connect unsecured. To connect with the secured method, which we recommend, you will need to change the SSL and port options to match those below. We have included screen shots below for iPhone and Microsoft Outlook.
Account Login
User: Complete email address
Password: One assigned to you
Incoming Settings (Secure)
Server : secure90.hostw3.com
POP3 Port: 995
IMAP Port: 993
Use SSL: Yes
SMTP Settings (Secure)
Server: secure90.hostw3.com
Use SSL: Yes
SMTP Port: 587
iPhone Secure Email Settings
‘Android’ POP Email Settings
Step 1: From the Home screen, tap the Apps icon and the Email app.
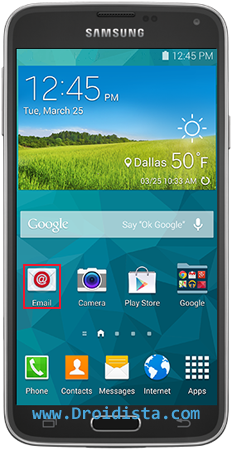
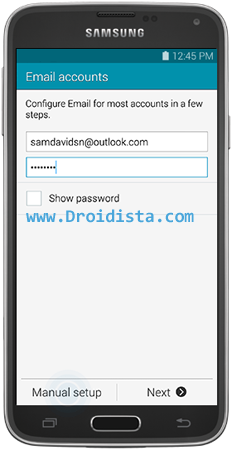
Step 2: Enter your email address and your password and choose Manual Setup to manually enter server settings.
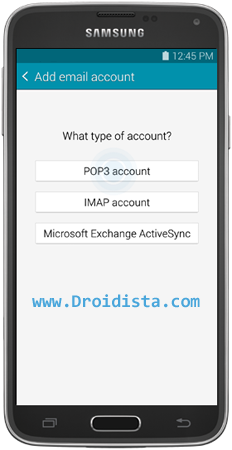
Step 3: Choose the POP3 account option.
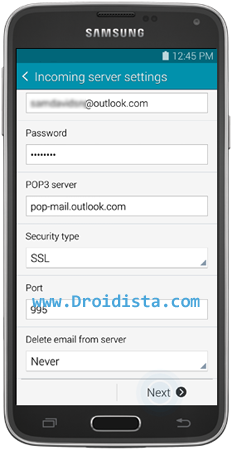
Step 4: Enter the POP3 incoming server settings, which include username, password, POP3 server name, Security type, Port number, and the setting for Delete email from server.
POP3 Server : secure90.hostw3.com
Security Type: SSL
Port: 995
Tap the Next button once you're done. The phone will then try to connect to the incoming server to login, if the process was unsuccessful, you will be prompted to Edit details and try again.
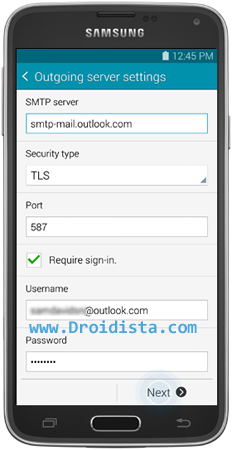
Step 5: Once the phone successfully logged in to the incoming server, you will be brought to the Outgoing server settings and will be asked to enter SMTP server, Security type, Port number, Require sign-in, username and password.
SMTP Server: secure90.hostw3.com
Security Type: Auto or TLS
Port: 587
Require Sign-in: Yes
Your phone will also attempt to connect to the outgoing server, if unsuccessful you will have to edit and double-check the settings; if successful, you should contact us.
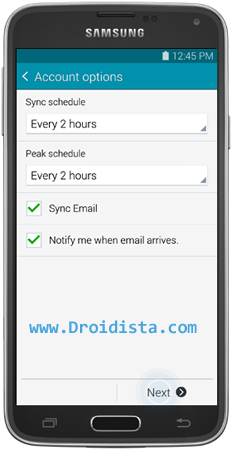
Step 6: You will have to set Period to sync Email, Sync schedule, Peak schedule, Sync email, Notify me when email arrives, and Automatically download attachments when connected to a Wi-Fi network.
Tap Next when done.
Step 7: The next screen will ask you to enter a unique on-screen name and the name you want to appear on outgoing messages.
Touch Done when complete.
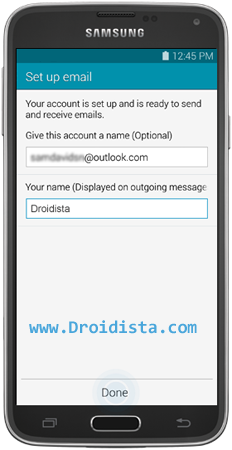
At this point, the setting up of your email account is finished.
